In this short tutorial I will explain how to get started with an ASP.NET 5 WebAPI application and how to deploy this in a Docker Container.
ASP.NET 5 is an open source web framework for building modern web applications that can be developed and run on Windows, Linux and the Mac. It includes the MVC 6 framework, which now combines the features of MVC and Web API into a single web programming framework. ASP.NET 5 will also be the basis for SignalR 3 - enabling you to add real time functionality to cloud connected applications. ASP.NET 5 is built on the .NET Core runtime, but it can also be run on the full .NET Framework for maximum compatibility.
Some of the improvements of ASP.NET 5:
- Build and run cross-platform ASP.NET apps on Windows, Mac and Linux
- Built on .NET Core, which supports true side-by-side app versioning
- New tooling that simplifies modern Web development
- Single aligned web stack for Web UI and Web APIs
- Cloud-ready environment-based configuration
- Integrated support for creating and using NuGet packages
- Built-in support for dependency injection
- Ability to host on IIS or self-host in your own process
Docker is a platform for developers and sysadmins to develop, ship, and run applications. Docker lets you quickly assemble applications from components and eliminates the friction that can come when shipping code. Docker lets you get your code tested and deployed into production as fast as possible.
Some of the benefits of Docker:
- Easily build new containers, enable rapid iteration of your applications, and increase the visibility of changes. This helps everyone in your organization understand how an application works and how it is built.
- Docker containers are lightweight and fast! Containers have sub-second launch times, reducing the cycle time of development, testing, and deployment.
- Docker containers run (almost) everywhere. You can deploy containers on desktops, physical servers, virtual machines, into data centers, and up to public and private clouds.
- Since Docker runs on so many platforms, it’s easy to move your applications around. You can easily move an application from a testing environment into the cloud and back whenever you need.
- Docker’s lightweight containers also make scaling up and down fast and easy. You can quickly launch more containers when needed and then shut them down easily when they’re no longer needed.
- Docker containers don’t need a hypervisor, so you can pack more of them onto your hosts. This means you get more value out of every server and can potentially reduce what you spend on equipment and licenses.
- As Docker speeds up your work flow, it gets easier to make lots of small changes instead of huge, big bang updates. Smaller changes mean reduced risk and more uptime.
Prerequisites
The following tools and frameworks will be used during this tutorial:
ASP.NET 5 RC - https://github.com/aspnet/home
ASP.NET 5 is a new open-source, cross-platform, high performance and lightweight framework for building Web Applications using .NET.
Docker Toolbox - https://www.docker.com/docker-toolbox
The Docker Toolbox is an installer to quickly and easily install and setup a Docker environment on your computer. Available for both Windows and Mac, the Toolbox installs Docker Client, Machine, Compose, Kitematic and VirtualBox.
Yeoman - http://yeoman.io/
Yeoman is an open source client-side development stack, consisting of tools and frameworks intended to help developers quickly build high quality web applications.
Note: During this tutorial I will be using a Windows machine but this should also work for OS X or Linux.
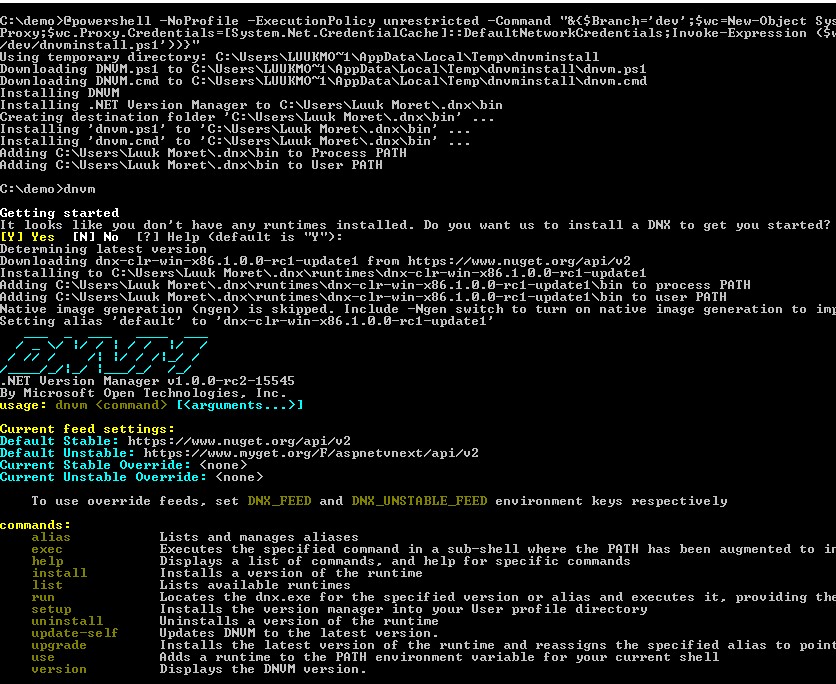
We will start by installing the dnvm. This is the new .NET Version Manager, a set of command line utilities to update and configure which .NET Runtime to use. Fire up a cmd prompt and run the following command:
@powershell -NoProfile -ExecutionPolicy unrestricted -Command "&{$Branch='dev';$wc=New-Object System.Net.WebClient;$wc.Proxy=[System.Net.WebRequest]::DefaultWebProxy;$wc.Proxy.Credentials=[System.Net.CredentialCache]::DefaultNetworkCredentials;Invoke-Expression ($wc.DownloadString('https://raw.githubusercontent.com/aspnet/Home/dev/dnvminstall.ps1'))}"
This will download the DNVM script and put it in your user profile. You can check the location of DNVM by running the following command in a cmd prompt: where dnvm
Now run dnvm and install the dnx when prompted.

Next, download and install the Docker Toolbox for Windows. Be sure to check Docker Client, Docker Machine, Docker Compose and VirtualBox. You can optionally check Docker Kitematic.
Lastly, we install Yeoman by running the following command: npm install -g yo and install the Yeoman generator for ASP.NET 5 projects by running npm install -g generator-aspnet.
Note: You need to have Node.js installed on your system to be able install node packages
Creating the application
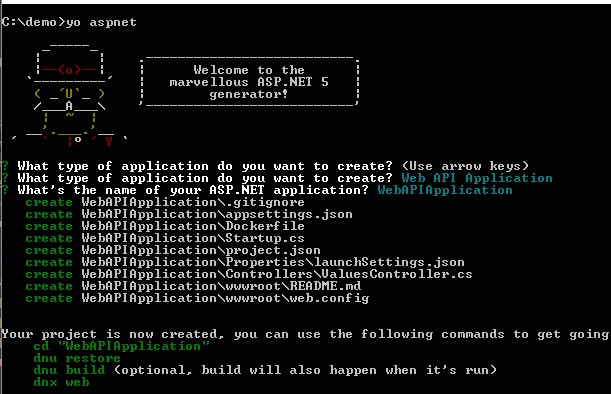
We are now ready to create our application! Start by executing yo aspnet and select the option Web API Application.

After the application is completed cd into the newly created folder and run dnu restore. This will install any missing NuGet packages.

You can optionally run dnu build which will compile the application, but this step is optional as it will automatically build the application when you run it.

We can run the application by executing dnx web. The application will, by default, run at http://localhost:5000. When you navigate to http://localhost:5000/api/values you should see the JSON response ["value1","value2"].


Now that we have the application running, we can deploy it in a container so we can easily share it with other people, or fire it up in an continuous integration workflow to perform automated tests.
Creating the Docker container
Dockerfile
Docker can build images automatically by reading the instructions from a Dockerfile. A Dockerfile is a text document that contains all the commands a user could call on the command line to assemble an image. Using docker build we can create an automated build that executes several command-line instructions in succession.
A Dockerfile should already by created when you scaffolded the project with Yeoman. Open this file and replace the content with the following code:
FROM microsoft/aspnet:1.0.0-rc1-final-coreclr

COPY . /demo
WORKDIR /demo
RUN ["dnu", "restore"]

EXPOSE 5000
ENTRYPOINT ["dnx", "web"]
FROM will pull the microsoft/aspnet image from Docker Hub (which is based on Debian “jessie”).
COPY will copy everything from the current directory to a folder called demo in the container.
WORKDIR changes the working directory to this folder and execute dnu restore.
EXPOSE informs Docker that the container listens on the specified network ports at runtime. EXPOSE does not make the ports of the container accessible to the host. To do that, you must use either the -p flag to publish a range of ports or the -P flag to publish all of the exposed ports. You can expose one port number and publish it externally under another number. This is mostly used as a documentation mechanism
Finally, open the file project.json and replace the code block
"commands": {
    "web": "Microsoft.AspNet.Server.Kestrel"
},
with
"commands": {
    "web": "Microsoft.AspNet.Server.Kestrel --server.urls http://*:5000"
},
The important part is the *, otherwise the Kestrel web server, A web server for ASP.NET 5 based on libuv, will only listen for localhost and we want it to listen everywhere.
Docker
Now we are ready to create our container. Start the Docker Quickstart Terminal. There should be a shortcut on your desktop when you installed the Docker Toolbox.

Navigate to the folder that contains the Dockerfile.
cd C:/demo/WebAPIApplication
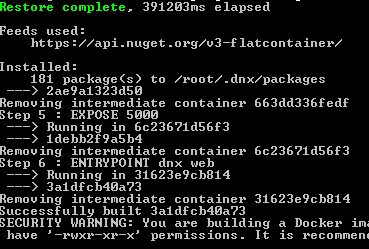
Run the following command docker build -t demo . This will create an image based on the Dockerfile.
When the image is done building, we can run the container with the following commanddocker run --name=demo -d -p 5000:5000 demo

--name=demo will be the name of the container.-d runs the container in detached mode.-p will map the port of the Docker Host to the port of the container.demo refers to the demo image we just created with the docker build command.
Now that the container is running, we can access it through the Docker Host. To get the IP address of the docker host, run the following command. docker-machine ip default. The default IP address should be 192.168.99.100.

The application with the JSON response endpoint should now be accessible at http://192.168.99.100:5000/api/values.

The ASP.NET WebAPI application is now running inside a Docker Container based on a Docker Host running Linux.
Docker
Now that the container is running, we can access it through the Docker Host. To get the IP address of the docker host, run the following command. docker-machine ip default. The default IP address should be 192.168.99.100. The application with the JSON response endpoint should now be accessible at http://192.168.99.100:5000/api/values.
To stop the container simply run docker stop demo and to start it again run docker start demo.
Closing notes
These are just the basics to get up and running with ASP.NET 5 and Docker containers. I encourage you to take a look at the new structure and features of ASP.NET 5 and explore the different Docker commands available.
Visit the following sites to read more about these topics:
- http://docs.docker.com/windows/started/
- https://github.com/aspnet/home/
- https://code.visualstudio.com/Docs/runtimes/ASPnet5
- http://blogs.msdn.com/b/webdev/archive/2015/01/14/running-asp-net-5-applications-in-linux-containers-with-docker.aspx
- http://www.hanselman.com/blog/BrainstormingDevelopmentWorkflowsWithDockerKitematicVirtualBoxAzureASPNETAndVisualStudio.aspx
- http://weblogs.asp.net/scottgu/introducing-asp-net-5
- https://docs.docker.com/engine/misc/
